
Overview
This article explains how to manage your Same Day Rules DDNS Service hostnames, which you will use to create subdomain names that are accessible across the Internet. Your hostnames and the resulting subdomain names allow you to access devices and services using familiar URLs whose underlying internet addresses (i.e., IP addresses) can be dynamic. For example, you can establish a hostname called ws.samedayrules.net for your home weather station controlled by your favorite microcomputer. Then, when you’re out of town, you can bring up your weather station display served by that favorite microcomputer using the URL https://ws.samedayrules.net. And, if the IP address of your home network changes, which would cause your hostname to become outdated, the DDNS Update Client software running on your home network will ensure that the IP address is updated accordingly, keeping everything in working order.
Requirements
In order to use the Same Day Rules DDNS Service you have to:
- Understand how the DDNS service works.
- Register as a Same Day Rules user.
- Subscribe to the DDNS Service.
Once you’ve met these requirements, then navigate to the DDNS Management Dashboard:
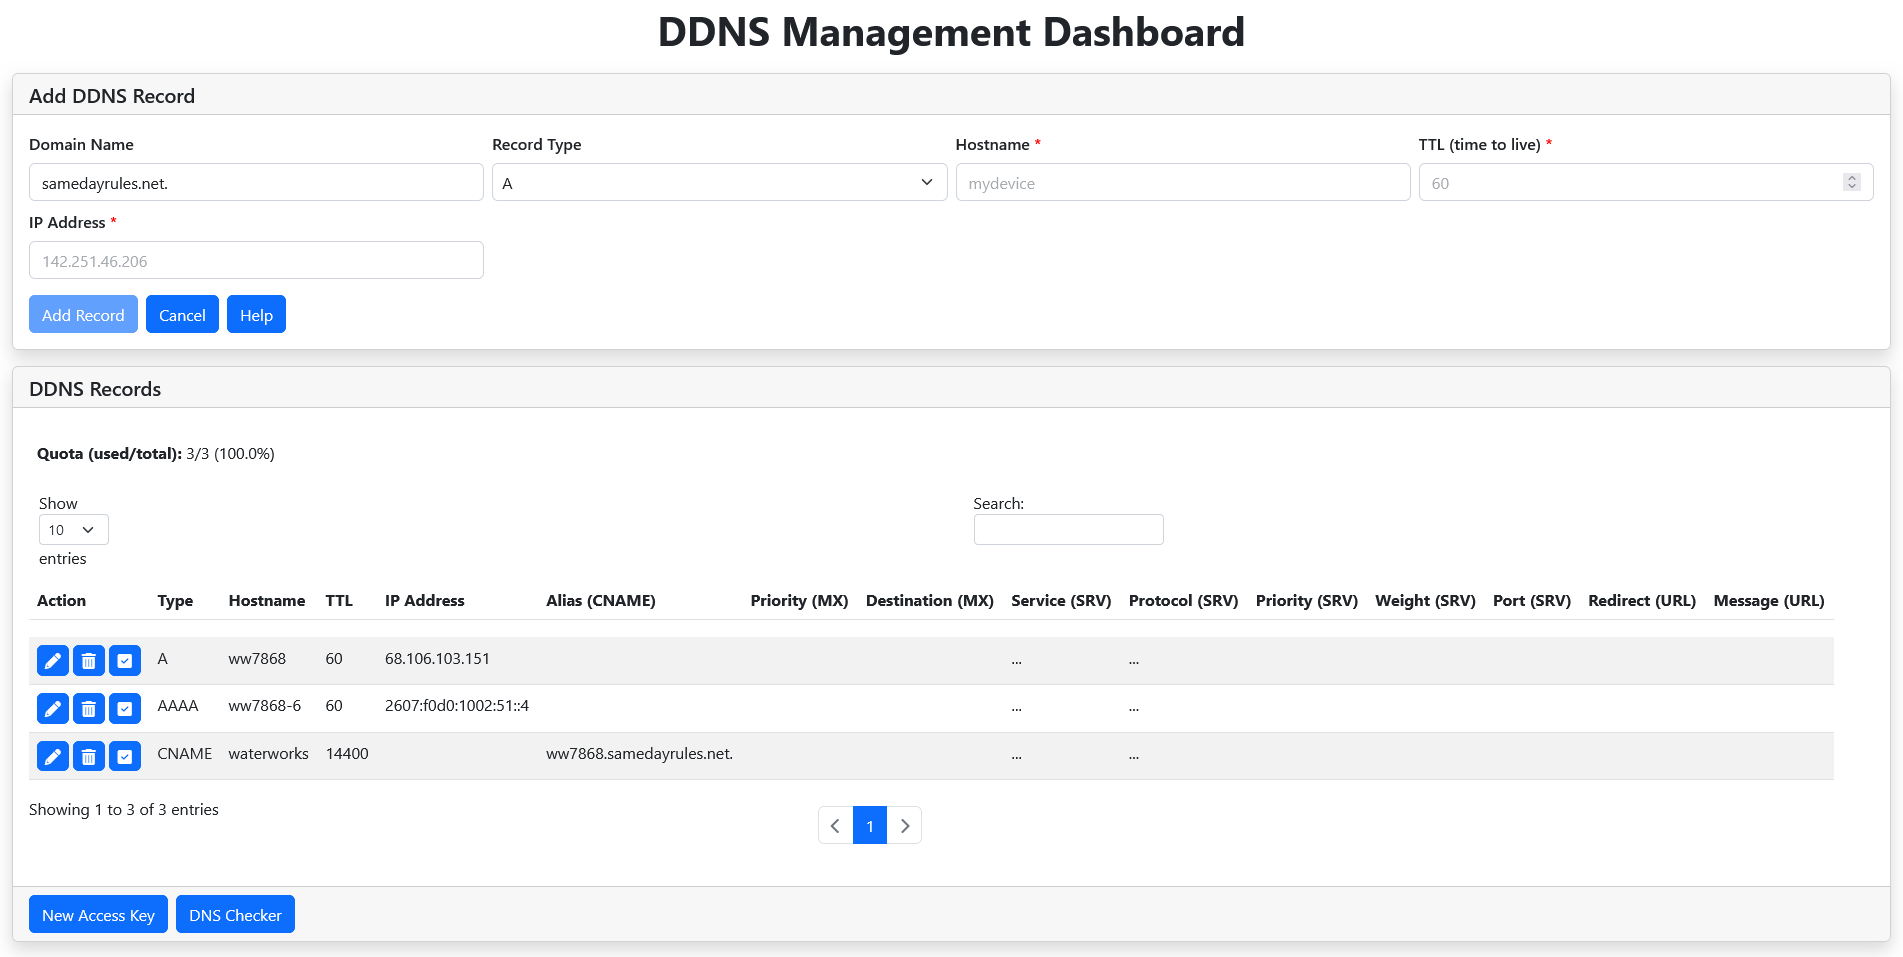
The dashboard shows:
| Add DDNS Record | User input fields for entering and updating DDNS record data. Fields with a red asterisk are required. |
| DDNS Records | A list of your current DDNS records. Your record quota is displayed at the top of the table. |
| New Access Key | Click the button to request a new DDNS service access key. |
| DNS Checker | Click the button to open a DNS propagation tool to verify that your DDNS records are live. |
Hostname Records
Hostnames are managed by adding, updating, and deleting DNS records that associate a hostname with an IP address. So when we speak of managing your hostnames, we do this by managing DNS records that reference those hostnames.
To add a record, start by selecting a Record Type from the dropdown list in the Add DDNS Record section.
The common input fields and their meanings are:
| Domain Name | The domain that all records will use. It represents the second-level domain (samedayrules) and the top-level domain (net). When you refer to your hostnames across the Internet, all of them will end in this. The trailing period represents the “root” level within the DNS hierarchy. |
| Record Type | The DNS record type. Supported record types include A, AAAA, CNAME, MX, SRV, and URL (a custom record type). |
| Hostname | The hostname associated with this record. This name will be prepended to samedayrules.net to establish your subdomain name. For example, if your hostname is cam1, then your fully qualified domain name will be cam1.samedayrules.net. Hostnames must be unique across the samedayrules.net domain. They can only contain letters, numbers, and the dash (‘-‘). They cannot start or end with the dash. They must be between 1 and 63 characters long. |
| TTL (time to live) | The TTL field specifies how long the record should be considered active or valid. It generally determines when a DNS server will reach out and attempt to update their copy of this record. The value is specified in seconds, with a minimum of 30 seconds and a maximum of 86400 seconds or one day. A reasonable value for a hostname whose IP address might change frequently would be 60 seconds. |
| IP Address | The initial value for the IP address for this record. This should be set to the current IP address of the device that you wish to access over the Internet. For home networks, this is likely the IP address of your ISP cable modem or broadband gateway device (this IP address is usually available on your home wireless router). This value will be overwritten by active DDNS Update Clients that you may have configured or that you will configure. |
Hostname Record Types
The hostname record type determines what the record can be used for. The different record types are their functions are described below.
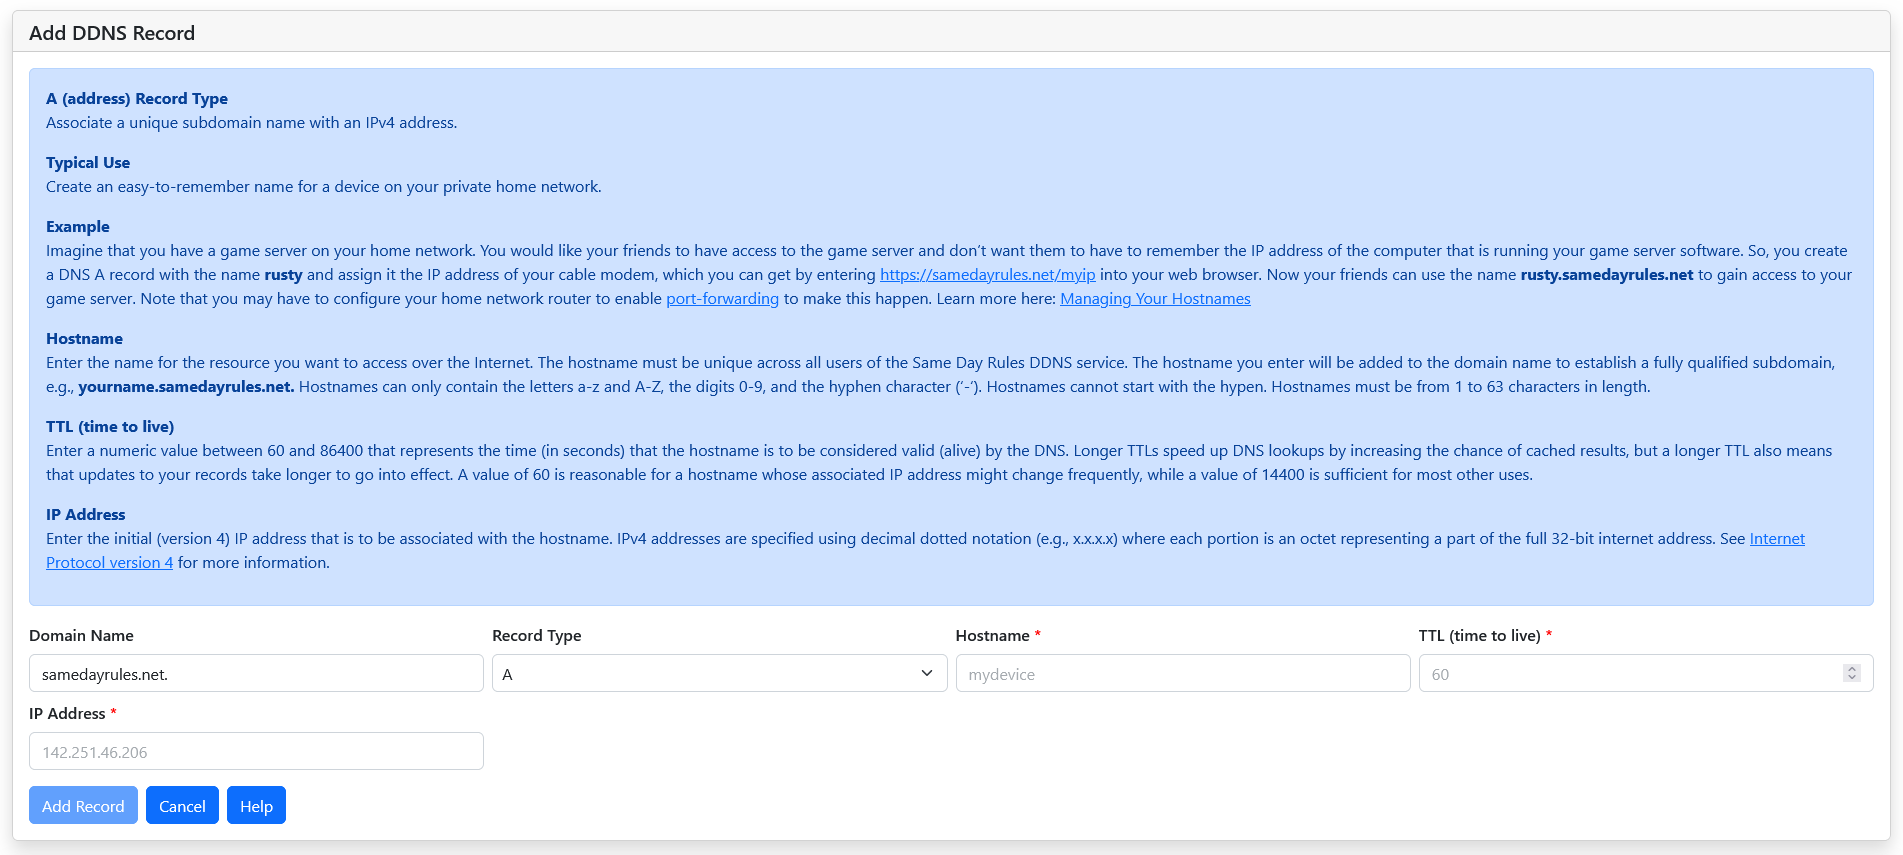
A record
The A record, or “address” record, is used to associate a hostname with an IP address. This is the most common type of record that you would normally use with the DDNS Service. The A record supports IPV4 addresses, the most common type of IP address at this point in time. The DNS system uses your hostname and searches for the A record associated with it to resolve its IP address. IPV4 addresses look like: 104.244.42.193
AAAA record
The AAAA record, also an “address” record, serves the same purpose as the A record except that it support longer IPV6 addresses. IPV6 addresses are less common, and support a larger number of internet devices. IPV6 addresses look like: 2001:0db8:85a3:0000:0000:8a2e:0370:7334
CNAME record
The CNAME record, or “canonical name” record, is used to create an alias for another domain name, somewhat like an “also known as” name for people. The hostname associated with a CNAME record simply points to, or stands for, another domain name. If you use this record type, then you’ll supply a unique hostname, the alias, and then you’ll supply a fully qualified domain name that the alias points to. Fully qualified domain names must end in a period.
MX record
The MX record, or “mail exchange” record, is used to specify where emails for a domain should be routed. With an MX record, it’s possible to direct emails to a dedicated email server. This allows you to delegate supporting webmail on a domain that you own to a specialized email provider. If you use this type of record, then you’ll supply a unique hostname, which identifies a new subdomain, and then the fully qualified name of the mail server that is designated to manage email for that new subdomain. Fully qualified domain names must end in a period.
SRV record
The SRV record, or “service locator” record, enables service discovery in the DNS. The SRV record makes it easier for web applications, such as chat applications, audio/video streaming services, VoIP, and others, to connect to the relevant server on the correct port number. It is frequently used when configuring SIP (Session Initiation Protocol) or some other third-party service. This type of record requires a service type (e.g., HTTPS), a service protocol (e.g., TCP or UDP), a service priority (a lower value means more preferred), a service weight (a higher value means a higher chance of getting picked), and finally a service port.
URL record
The URL record, or “redirect” record, is used to establish a hostname for easy access to a known internet URL having a possible port number and path specifier. Often times access to a resource on a private network requires the specification of a port number and internet path that uniquely identifies a software application running on the private network. The URL record provides a means of creating a memorable hostname for a possibly much more complicated end point associated with a network resource.
Adding Records
To add a new record:
- Open the Manage Records dialog box.
- Select the type of record from the Record Type dropdown list.
- In the Hostname field, enter a unique name.
- In the TTL field, enter the number of seconds this record should be considered valid by DNS servers.
- For A and AAAA records, in the IP Address field, enter the IP address (IPV4 or IPV6) to assign to the hostname.
- For CNAME records, in the CNAME field, enter the fully qualified domain name that the CNAME points to.
- For MX records, in the Priority field, enter a number between 1 and 100 (10 is a good start).
- For MX records, in the Destination field, enter the fully qualified domain name where email is to be sent.
- For SRV records, in the Service field, select the symbolic name for the desired service.
- For SRV records, in the Protocol field, select the symbolic name for the desired protocol that supports the selected service.
- For SRV records, in the Priority field, enter the priority of the target host (lower means more preferred).
- For SRV records, in the Weight field, enter a relative weight for records with the same priority (higher means more preferred).
- For SRV records, in the Port field, enter the TCP or UDP port on which the service is to be found.
- For URL records, in the Active Redirect field, enter the URL as you would type it in a web browser that identifies the network resource you would like the hostname to reference.
- For URL records, in the Inactive Message field, enter the text that you would like displayed to users when they attempt to access the hostname in the case when the hostname has been made inactive.
- Select Add Record to save your input.
- Select Help to get detailed information on the selected record type (toggles help on/off).
The record will be added, and the DDNS Records table will be updated.
Table Controls
There are several controls surrounding the DDNS Records table that can be used to manipulate the appearance of the table data:
| Quota | Though not a control per se, your DDNS record quota is shown at the top of the table. The number of records that you have used and your total records allowed are displayed. The percentage of your quota used is also displayed. |
| Show Entries | The dropdown allows you to select how many entries are shown in the table at a time. |
| Search | The search field allows you to find (filter) records that you want displayed. Only records that contain fields matching your filter will be displayed. |
| Sort | By clicking on the heading of a field in the table, you will sort the table on that field. Click once to sort ascending, click again to sort descending. |
| New Access Key | Clicking this button will display a dialog box with a new subscription access key. Your access key is required by DDNS Update Client software to securely update your hostnames with changing IP addresses. |
| DNS Checker | Clicking this button will open a new web page that will allow you to type in your DDNS record hostname, and then watch as that name propagates across the Internet. |
Editing Records
To edit a record:
- Click on the pencil icon () next to record in the DDNS Records table that you wish to edit.
- Change the field(s) that you desire.
- Select Save to save your changes.
Deleting Records
To delete a record:
- Click on the trash can icon () next to the record in the DDNS Records table that you wish to delete.
- In the dialog box that appears, select Yes to delete the record.
Active/Inactive Records
To toggle a record between Active and Inactive:
- Click on the check box icon () next to the record in the DDNS Records table that you wish to toggle.
- The record will switch between the two states, and the check mark will appear/disappear appropriately.
DNS Record Activation
Your new hostnames should be active within 24-48 hours if not much sooner. Changes to DNS records must propagate across the Internet though hundreds of name servers. That process can sometimes take a relatively long time. You can use online DNS propagation tools to see your new hostnames spread across the Internet. Try any of the following (just type in your new hostname and tell the tool to search for the name):
DNS Checker
DNS Propagation Checker
DNSMap
Need Help
If you need help setting up the DDNS Service, just give us a call or send us an email. We’ll get back to as soon as possible.